


Stripe Payment Scheme for Flutter


Stripe is a worldwide online payment platform used in 43 countries, including Poland. The undoubtful advantage of the platform is that it offers a multitude of configuration options.
There are three types of accounts (standard, express and custom) with varied integration manners and the number of available options.
The example discussed here is a simple market place where one user orders service from another user. Once the service is confirmed as complete, the funds are transferred between the users and the commission goes to the Company’s account. The integration described here includes development of your own backend which is closely customized to fit business processes of the application.
We have chosen the express account as our example because this account offers many options not available for the standard account and simultaneously, it does not require a lot of work during its integration.
Stripe and Flutter
Officially, Stripe’s native support is offered for Android, iOS and JavaScript web platforms. Even though, there is no official support for Flutter platform, it is possible to use Stripe when some effort is put into it. The set of libraries available under Flutter is small. It contains two items, both available at pub.dev, the official repository of libraries for Flutter:
- stripe-payment – a library which is a wrapper of the existing and popular tipsi-stripe library created for React Native
- stripe_sdk – a library wrote in Flutter
Both, have their pros and cons. The first one uses reliable solutions implemented by many companies, but it makes use of native components for entering payment data which is a huge drawback when it is necessary to use non-standard nesting of components in the Flutter’s widgets’ structure. The latter library does not have this problem. It is a new library under continued development. It has a wider range of options as compared to stripe_payment, however users have reported stability issues – Flutter is growing dynamically and so is the library. Because of a lower risk factor and a shorter integration time we recommend the stripe_payment library.
Design Basis
Stripe data which allows to charge the customer’s account is stored at the backend’s. The mobile app sends command to charge the accounst and services the addition of a new payment method.
The process which uses Stripe payments consists of the following steps:
- The customer places the order and defines the amount they would like to pay for the service.
- The app commands backend to charge the customer’s account.
- Backend checks if the customer has at least one payment method defined (in case of several payment methods, one of them is set as default and this one will be used).
- If a payment method is defined, backend attempts to use it for payment. And it communicates the result to the mobile app.
- If no payment method is defined, backend communicates the need to add a new payment method to the mobile app.
- The mobile app displays the message on whether the payment was successful or failed and in case of no payment method is defined, it displays a native component of the stripe_payment library for adding new payment methods.
- Once the new payment method is added, backend attempts to charge the customer’s account with the set amount and communicates the result to the mobile app.
Implementation
The first step is adding stripe_payment plugin to Flutter’s project. The plugin name together with the version number should be added to dependencies section in the pubspec.yaml file.
dependencies:
    stripe_sdk: 1.0.7
Prompting the flutter pub get command will cause the plugin to be downloaded and installed. Additionally, you have to ensure that the project’s support for AndroidX is enabled. The following entry should show in the android/gradle.properties:
android.useAndroidX=true
android.enableJetifier=true
The above payment algorithm shows that stripe_payment plugin is used for adding new payment methods. If the process is completed successfully, backend shall obtain an authenticated ID of the new payment method from Stripe which could be used to charge the customer’s account.
We start implementing the addition of the new payment method by importing the stripe_payment plugin.
import 'package:stripe_payment/stripe_payment.dart';
Next, we initialize the plugin by providing the key obtained during the Stripe account configuration. To do it, it is enough to enter the following code at the beginning of the main method.
StripePayment.setOptions(StripeOptions(publishableKey: ”stripePublishableKey”));
The new payment method adding code will be included in one asynchronous method which returns enum with the operation’s result. The process might be successful, unsuccessful or might be cancelled by the user.
enum AddNewPaymentResult { SUCCESS, FAIL, CANCELLED }

Future< AddNewPaymentResult > stripeAddNewPayment() async {
    // implement adding new payment process here
}
The first step is to download a secret one-time short-time ID (i.e. the client secret) from backend. As a trusted site backend downloads it from Stripe and transfers to the mobile app.
String clientSecret = await apiClient.getClientSecret();
The apiClient object handles communication with backend (request building, response parsing). It is a standard http client implementation in which objects are serialized to JSON format, serialized objects are sent to backend, the data is collected from backend in the JSON format and deserialized to the object form.
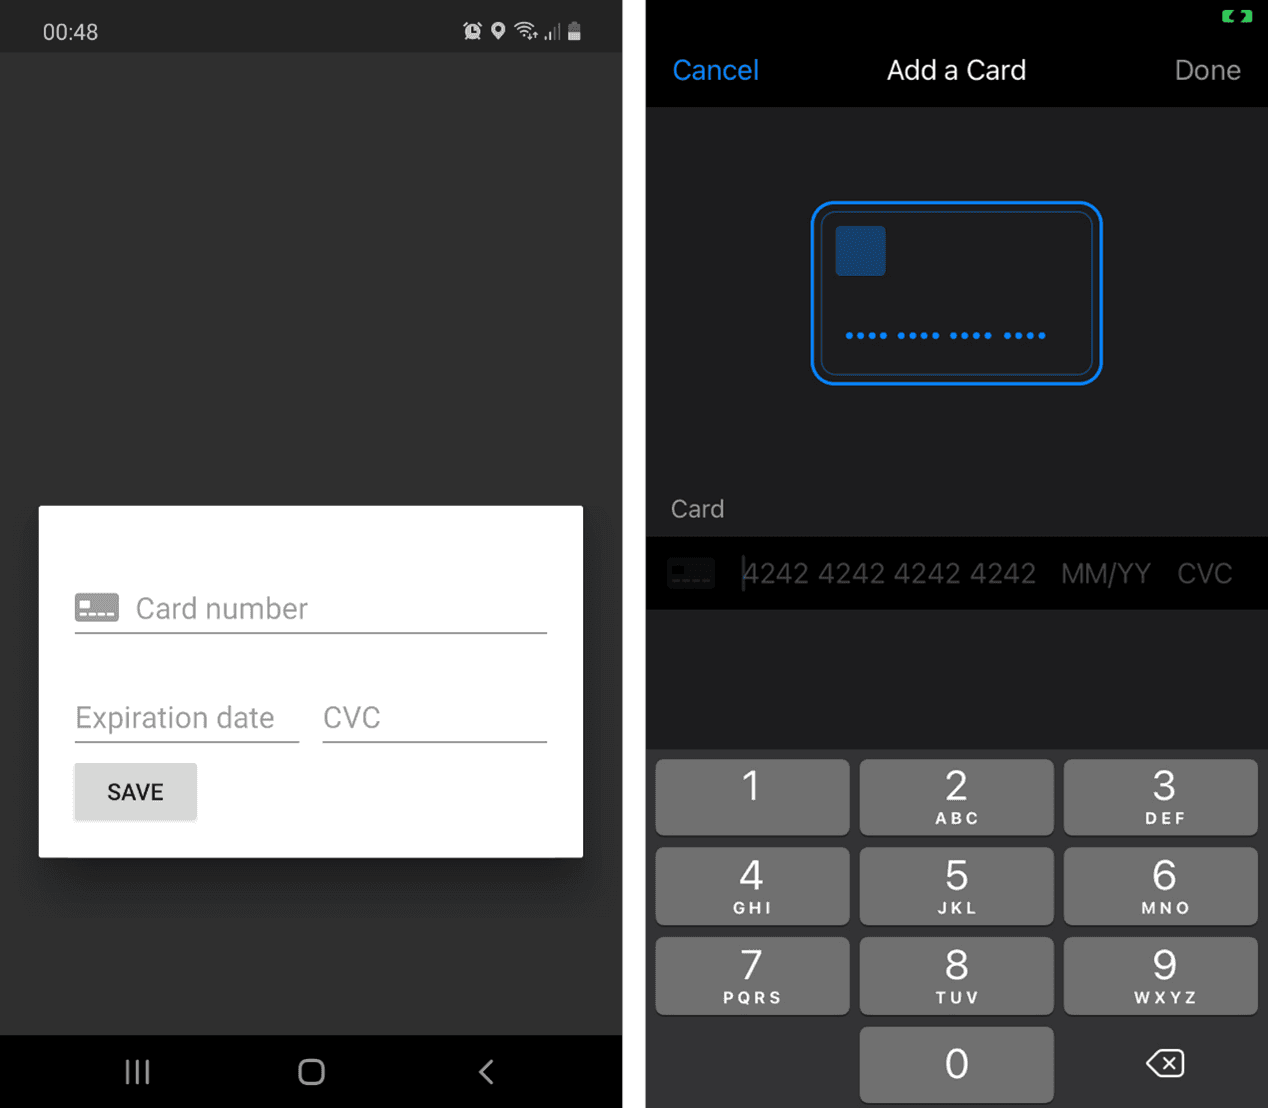
Next we prompt the stripe_payment plugin method which displays the native component with fields to be completed by the customer. The example project uses the credit card as the only available payment method.
PaymentMethod paymentMethod = await StripePayment.paymentRequestWithCardForm(CardFormPaymentRequest());
The paymentRequestWithCardForm() method returns the object representing the new payment method which is not authenticated by Stripe yet. The authentication is effected with the client secret ID obtained earlier.
PaymentIntent paymentIntent = PaymentIntent(clientSecret: clientSecret, paymentMethodId: paymentMethod.id);
SetupIntentResult result = await StripePayment.confirmSetupIntent(paymentIntent);
The result object contains information on the success or failure of the operation. If the operation was successful, backend will receive the new payment method data directly from Stripe through registered webhooks. Data of the new payment method do not go to the mobile app.
The user can cancel the operation of adding a new payment method, therefore we have to place the above code (and in particular the paymentRequestWithCardForm() method) in the try-catch block. Stripe_payment plugin displays the native component therefore PltaformException will be the object which we catch in the try-catch block.
try [
    PaymentMethod paymentMethod =
    await StripePayment.paymentRequestWithCardForm(CardFormPaymentRequest());
} catch (error) {
    if (error is PlatformException && error.code == 'cancelled')
        return AddNewPaymentResult.CANCELLED;
}
After putting together the above fragments we arrive at the code:
enum AddNewPaymentResult { SUCCESS, FAIL, CANCELLED }

Future<AddNewPaymentResult> stripeAddNewPayment() async {
    try {
        String clientSecret = await stripeRepository.getClientSecret();
        PaymentMethod paymentMethod = await StripePayment.paymentRequestWithCardForm(CardFormPaymentRequest());
        PaymentIntent paymentIntent = PaymentIntent(clientSecret: clientSecret, paymentMethodId: paymentMethod.id);
        SetupIntentResult result = await StripePayment.confirmSetupIntent(paymentIntent);
        return result.status == 'success' ? AddNewPaymentResult.SUCCESS : AddNewPaymentResult.FAIL;
    } catch (error) {
        if (error is PlatformException && error.code == 'cancelled')
            return AddNewPaymentResult.CANCELLED;
        else
            return AddNewPaymentResult.FAIL;
    }
}
After prompting the stripeAddNewPayment() method it is worth to wait a few seconds before the attempt to use the new payment method. Communication Stripe -> backend runs through webhooks and slight delays may occur.
The look of the component for adding a new payment method depends on the platform. Below you can see the version for Android on the left and the version for iOS on the right.
Conclusion
Stripe is a platform which offers many options and simultaneously, does not require a lot of integration work. If we add to this the worldwide coverage, we will get an interesting proposal for an online payment service.